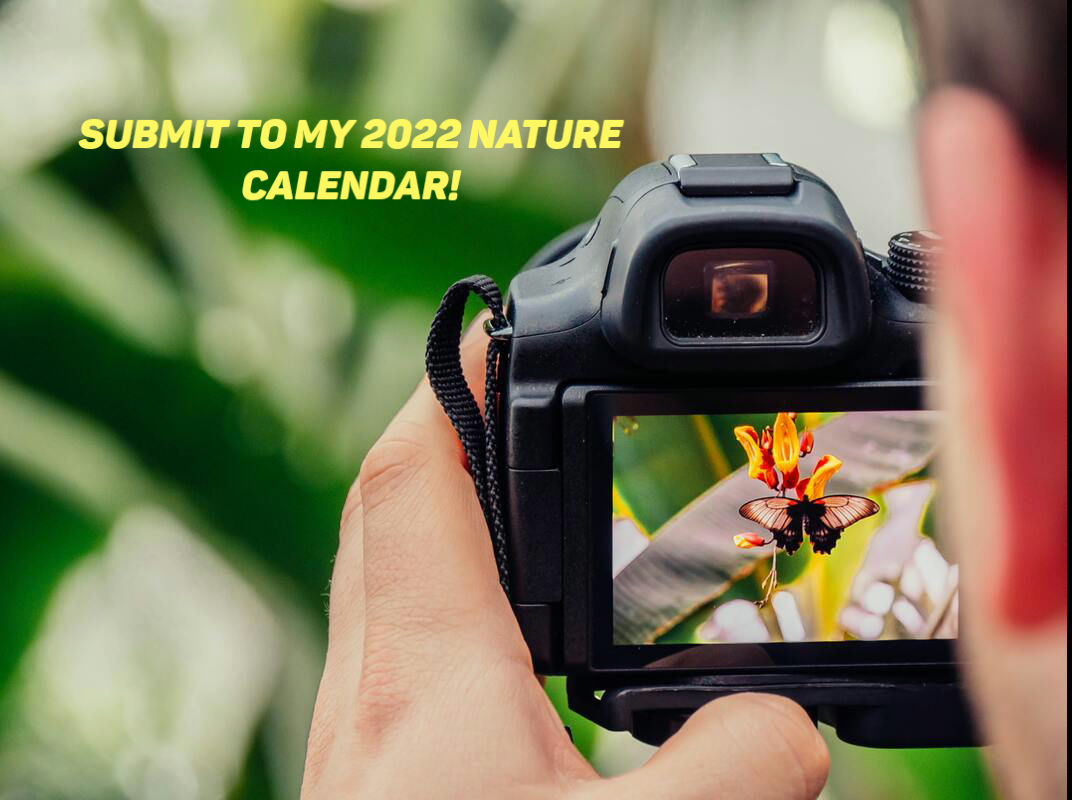
 Do you love God's creation? Do you love photography?
I have the perfect opportunity for you! Submit a photo to be featured in my 2022 Christian nature calendar. All proceeds from sales will help cover my medical expenses. The Rules:
By submitting, you also give me permission to edit your photo (eg: cropping and adding Scripture or quotes such as from hymns). Have fun, invite your friends to participate, and don't hesitate to contact me with any questions! I aim to have the calendars available for sale online by the end of August.
0 Comments
"This is my Father's world, And to my listening ears All nature sings, and round me rings The music of the spheres." ~ Maltbie D. Babcock, This Is My Father's World Today is National Nature Photography Day! Summer begins next week, and I hope you are enjoying God's creation and capturing His handiwork with your camera. My friends and I are, and we collaborated to bring you this post. May these pictures inspire you to also photograph the beauty of our Father's world. 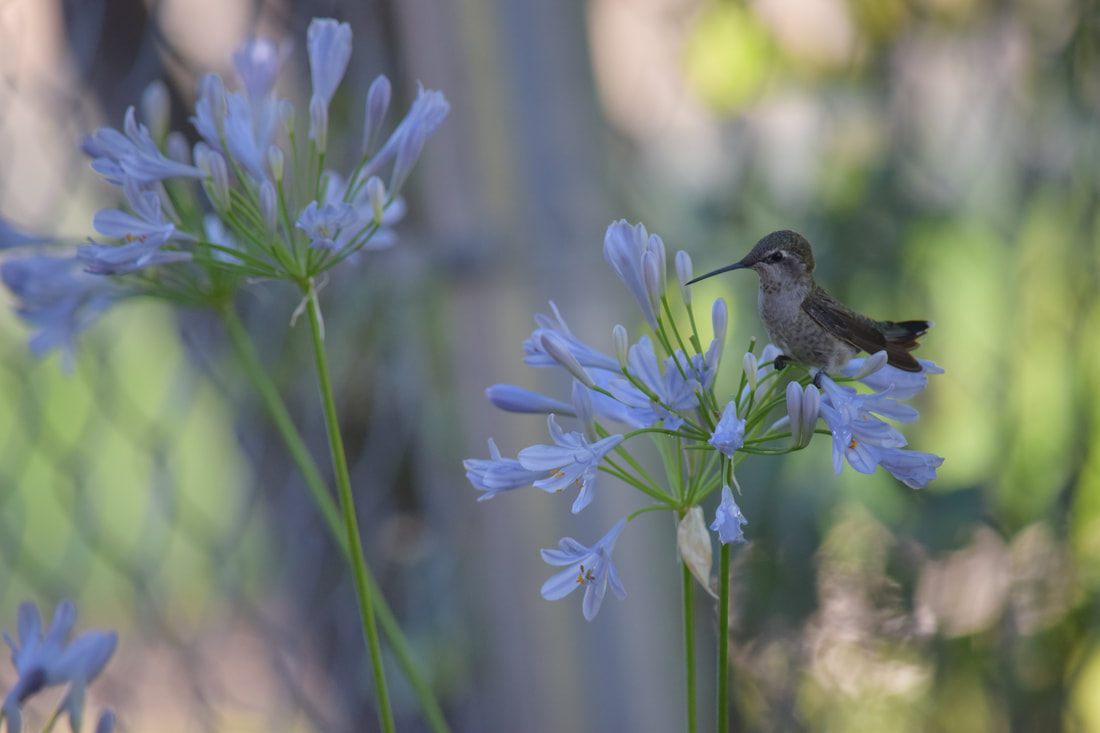 Hummingbird, Kristin Renfer 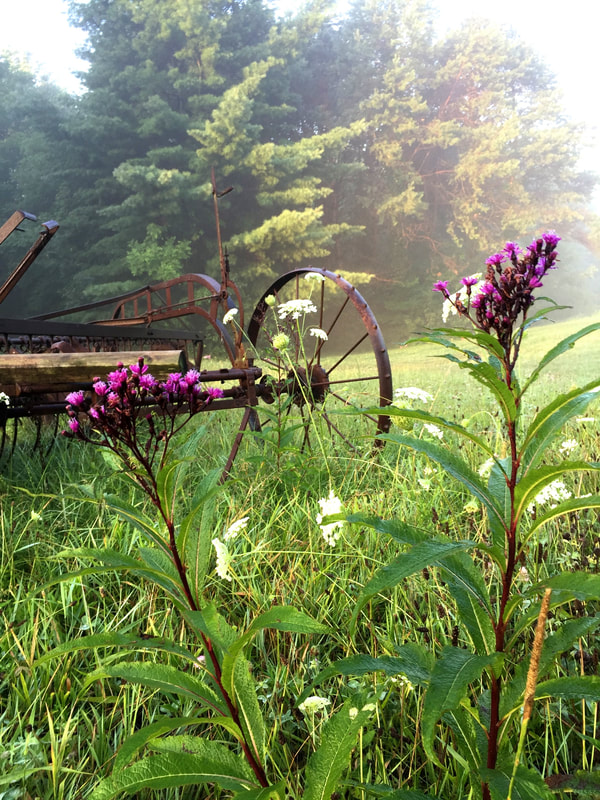 Morning at the Farm, Kim 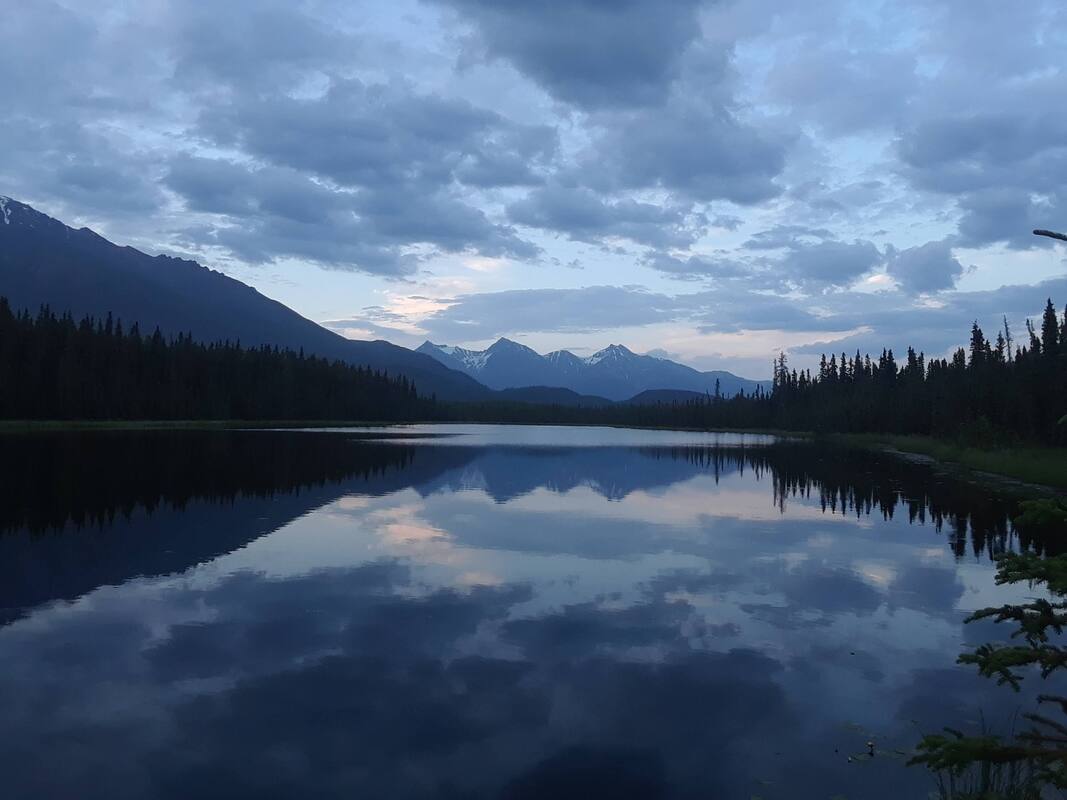 Wrangell-St. Elias National Park, AK, Nicholas Tegethoff  For Us the Living, Ben Watt 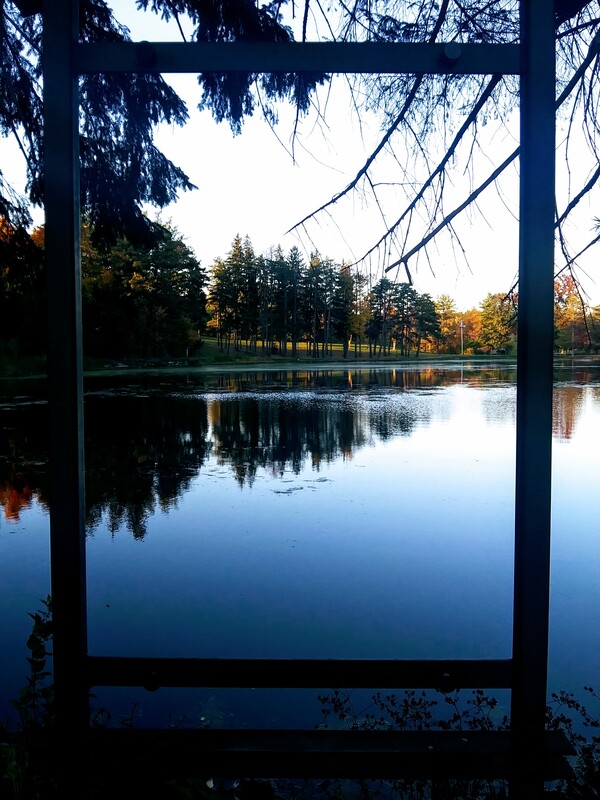 Framed Pond, Clark's Summit University, PA, Heidi 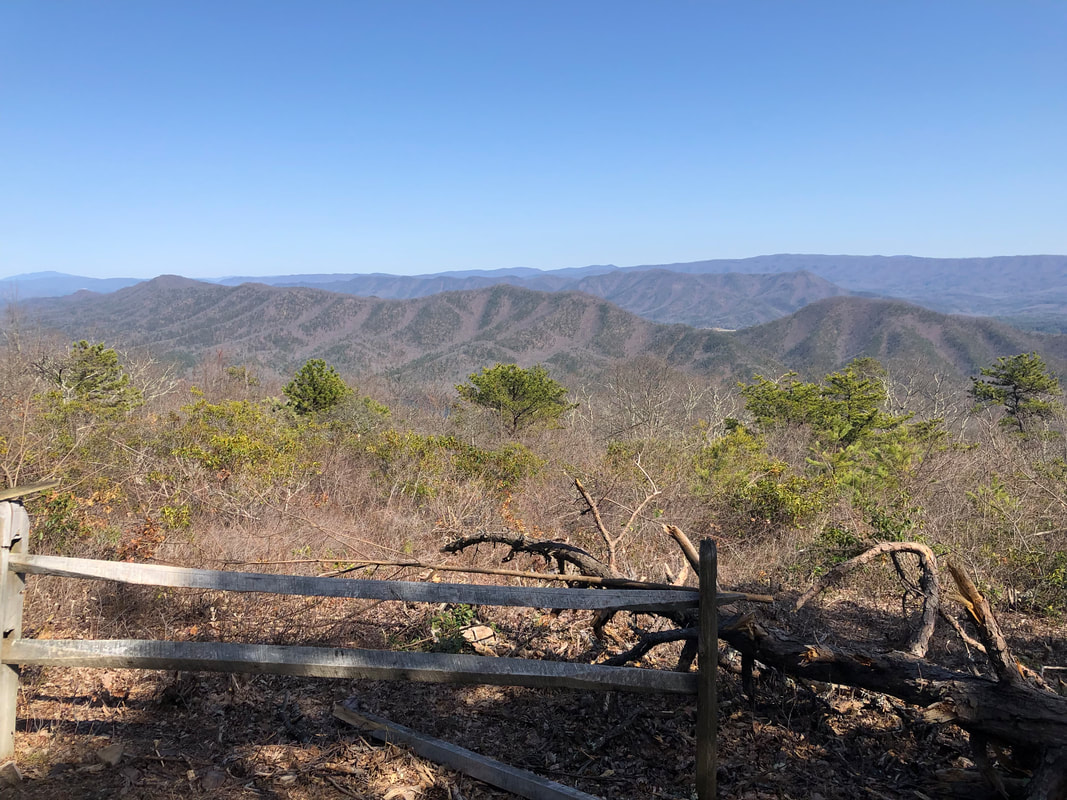 Douthat State Park, VA, Nathan 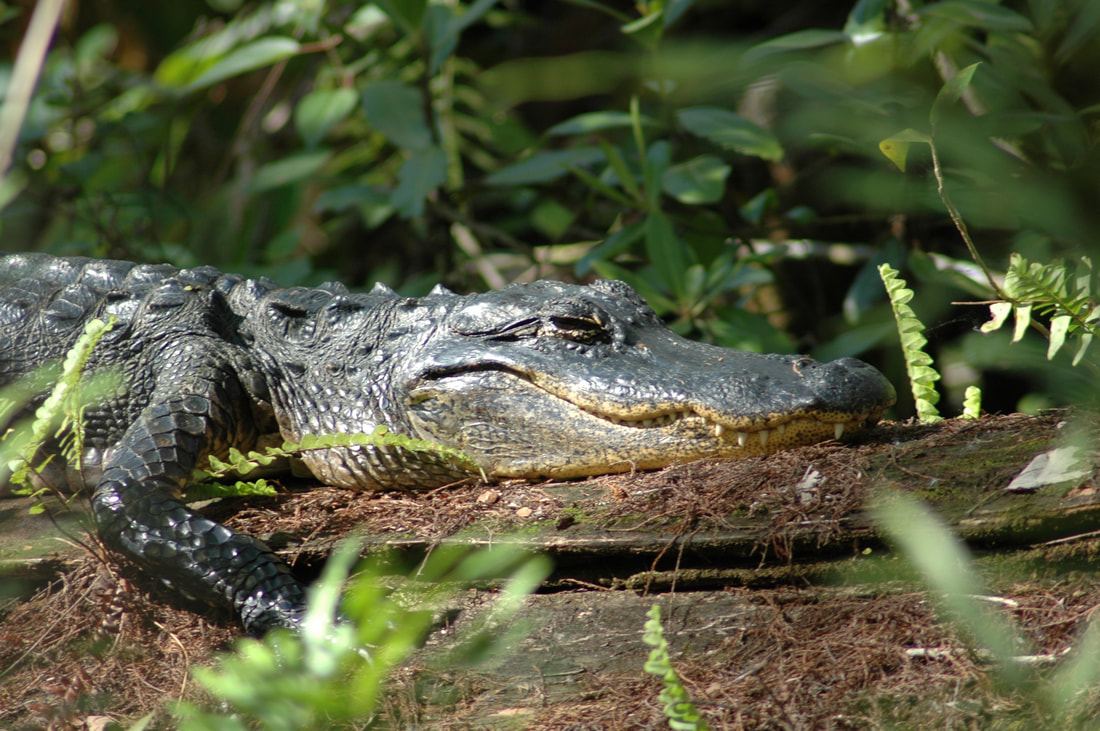 Alligator, Janice  Pymatuning Lake Sunset, PA, Grandpap Duane Watt 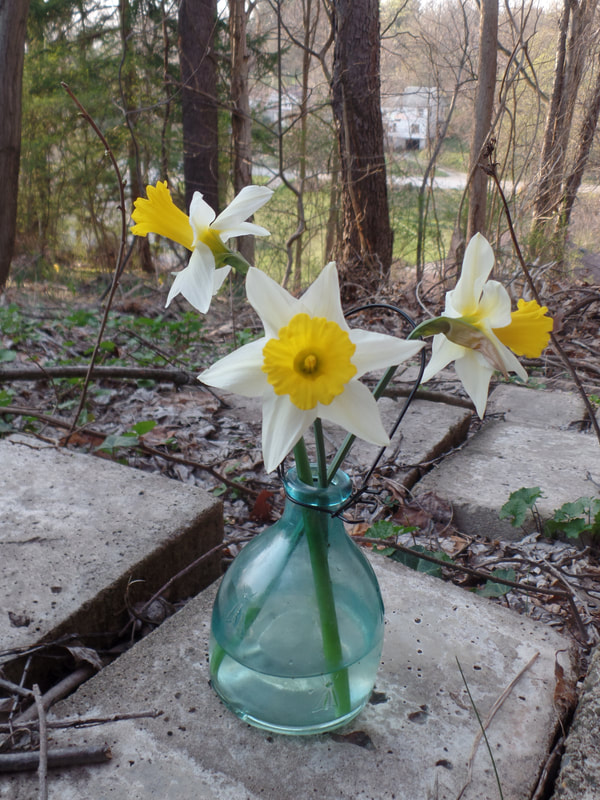 Daffodils in the Woods, Lauren Watt 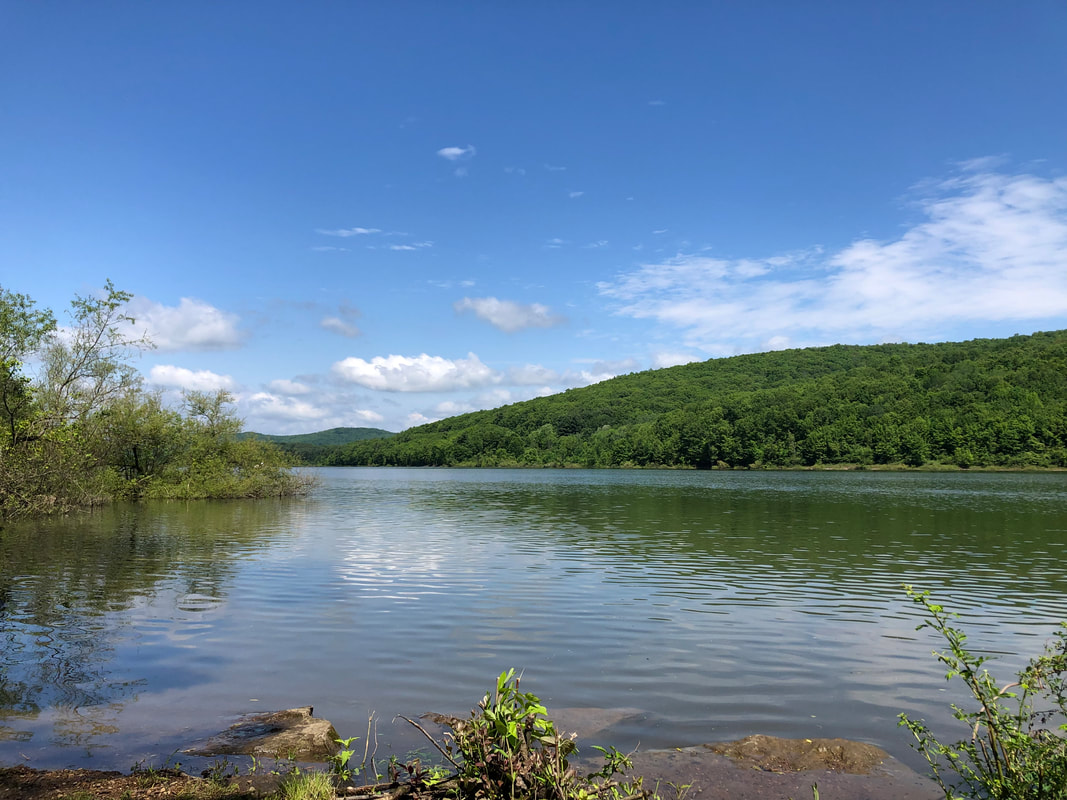 Willow Bay, Allegheny National Forest, PA, Hadley 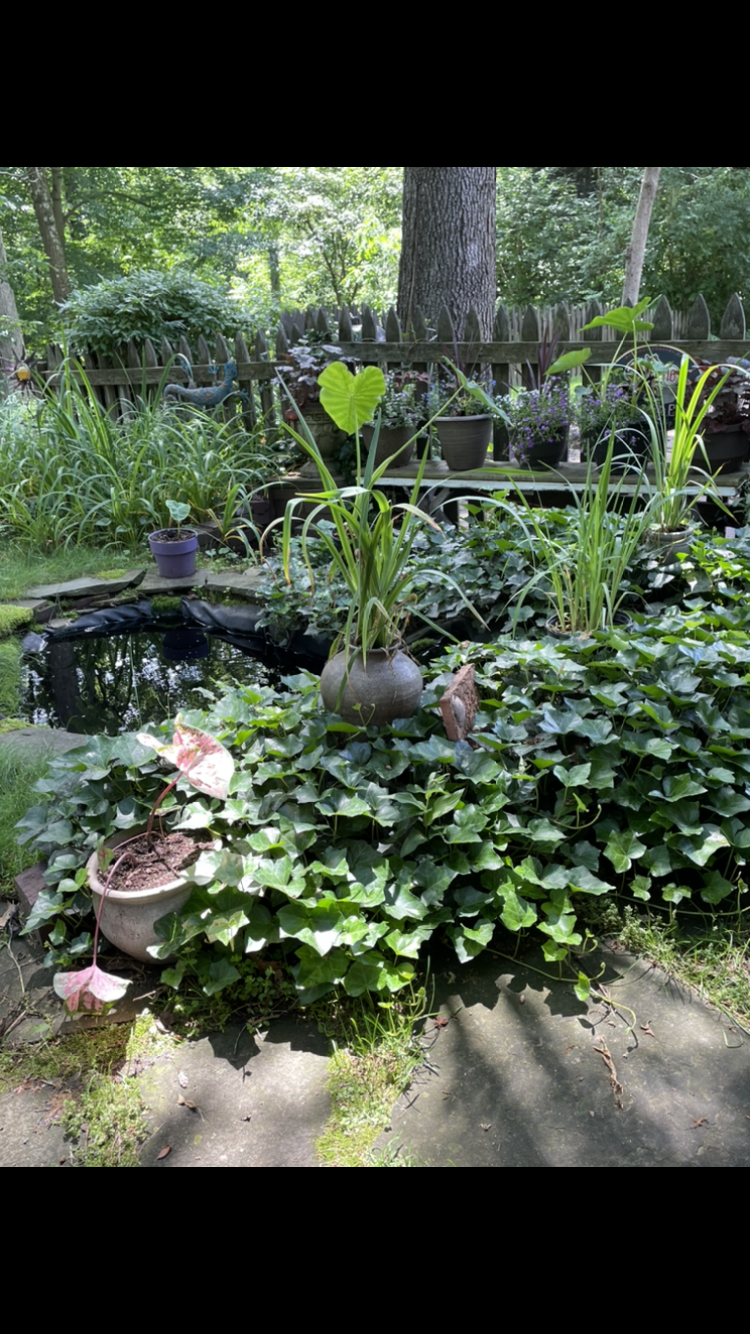 Backyard, Jim 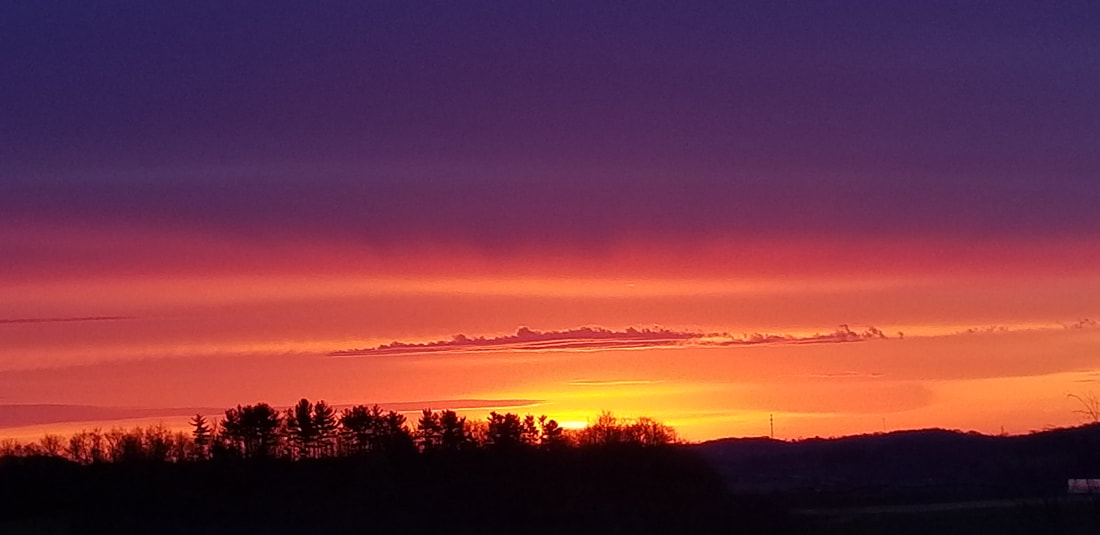 Easter Sunrise 2020, Penny Durbiano 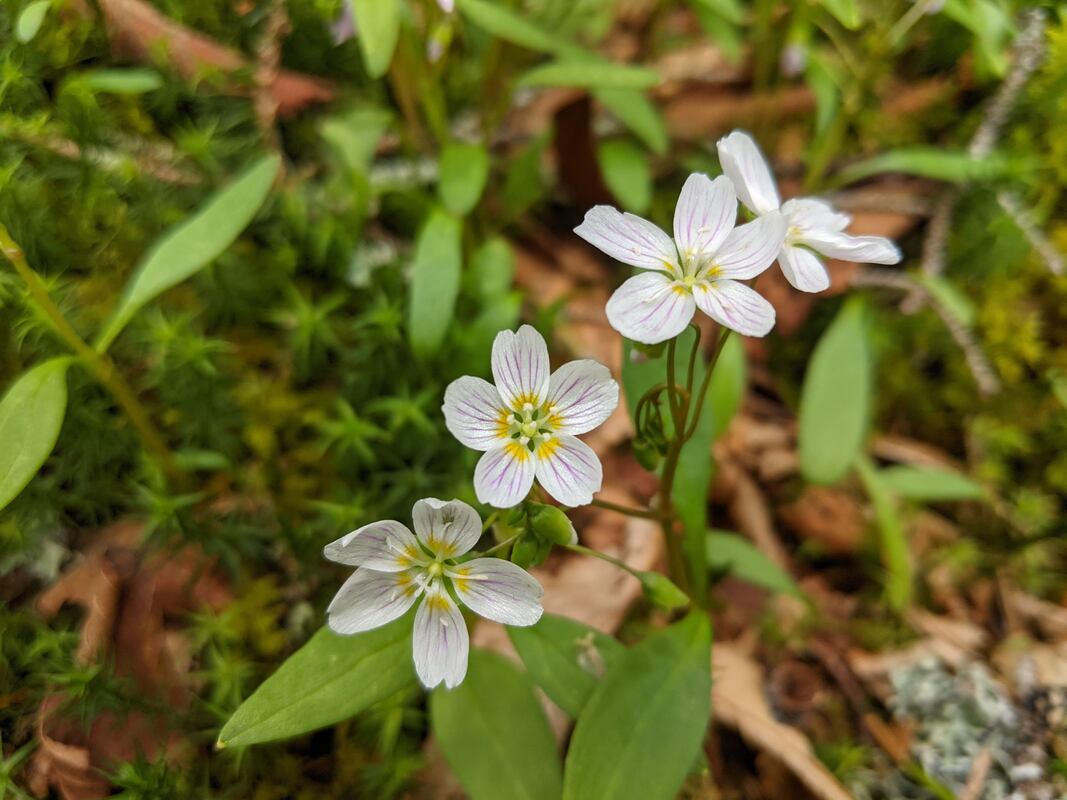 Virgina Spring Beauty, Alex Watt What was your favorite picture? Comment below!
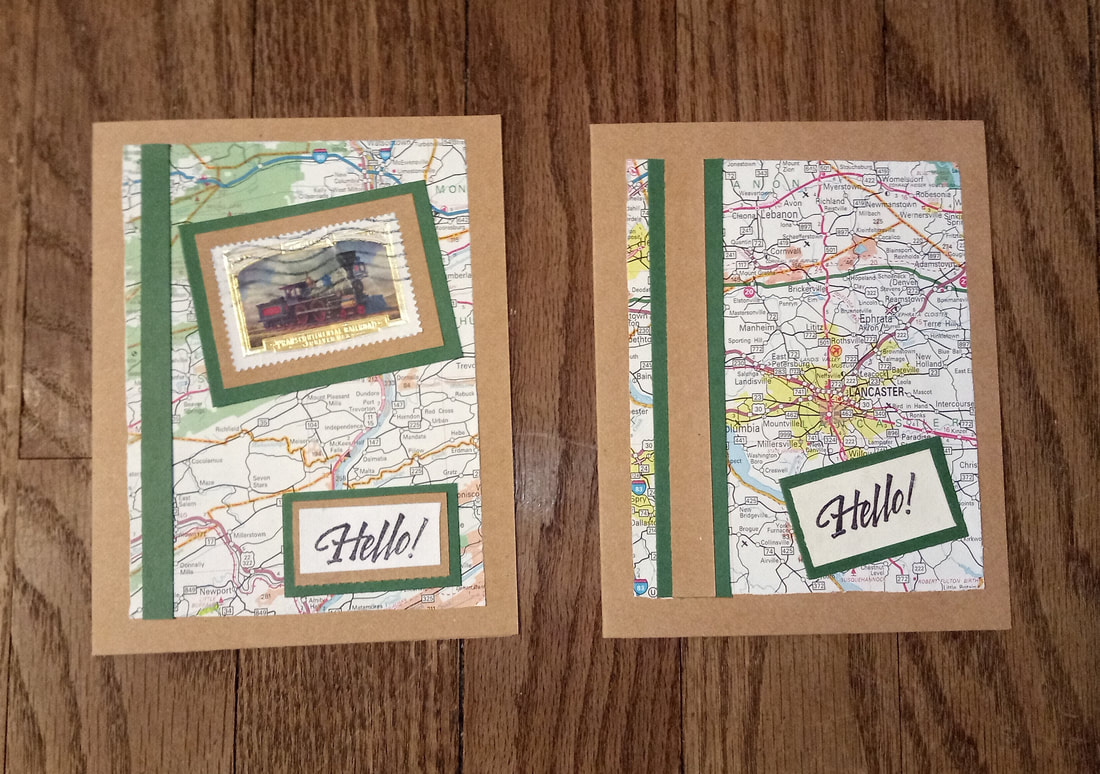 Health Tip: Want a bigger, healthier brain? Toss your GPS and revert to road maps! "A multinational team of investigators has found that using GPS might be harmful to your mind because it bypasses and thus atrophies your brain's hippocampus, which is the key to many everyday tasks as well as remembering the past and envisioning the future." (The Farmer's Almanac) But if you don't care about your hippocampus and your maps are simply collecting dust, use them to create cards. 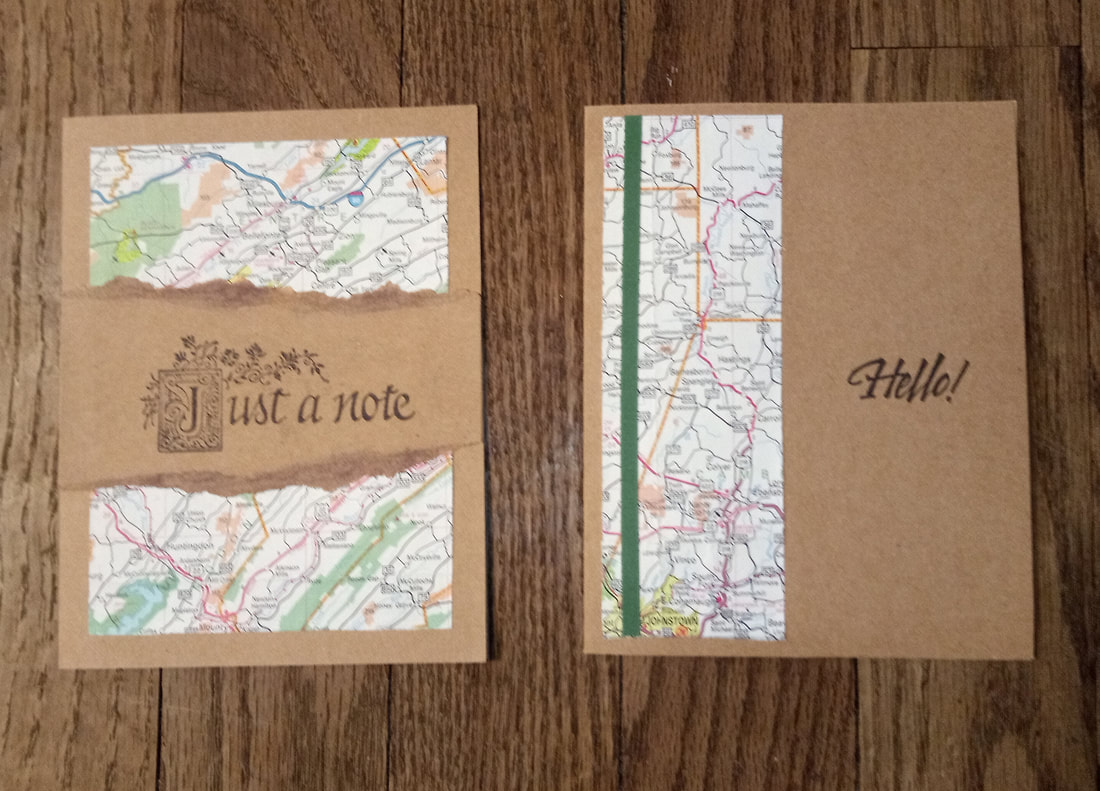 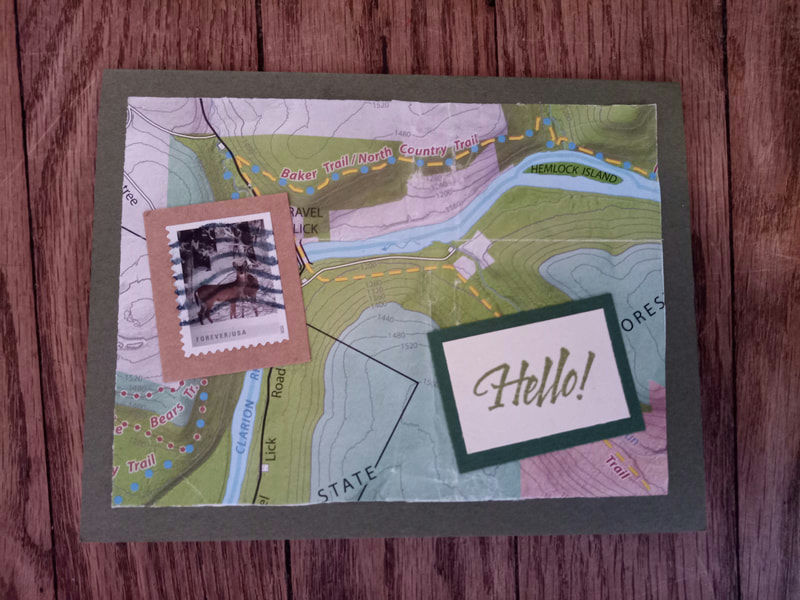 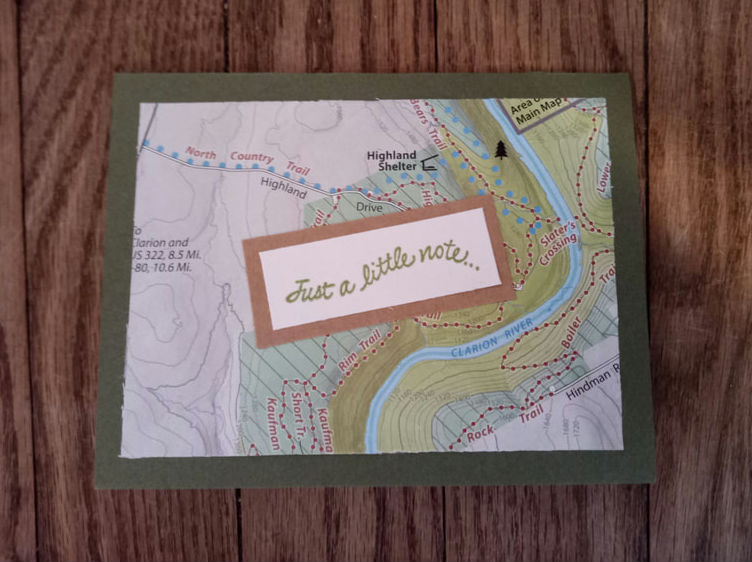 Be creative! Cut your map to the desired size and glue to your card. Stamp sentiments with ink, tear paper for a rustic look, use old postage stamps and scraps of cardstock for embellishments. Upcycle! Have fun and send some happy mail! Final Warning: Failure to navigate using road maps may result in hippocampus that shrinks so dramatically that you end up needing TWO GPSes. The evidence is below... 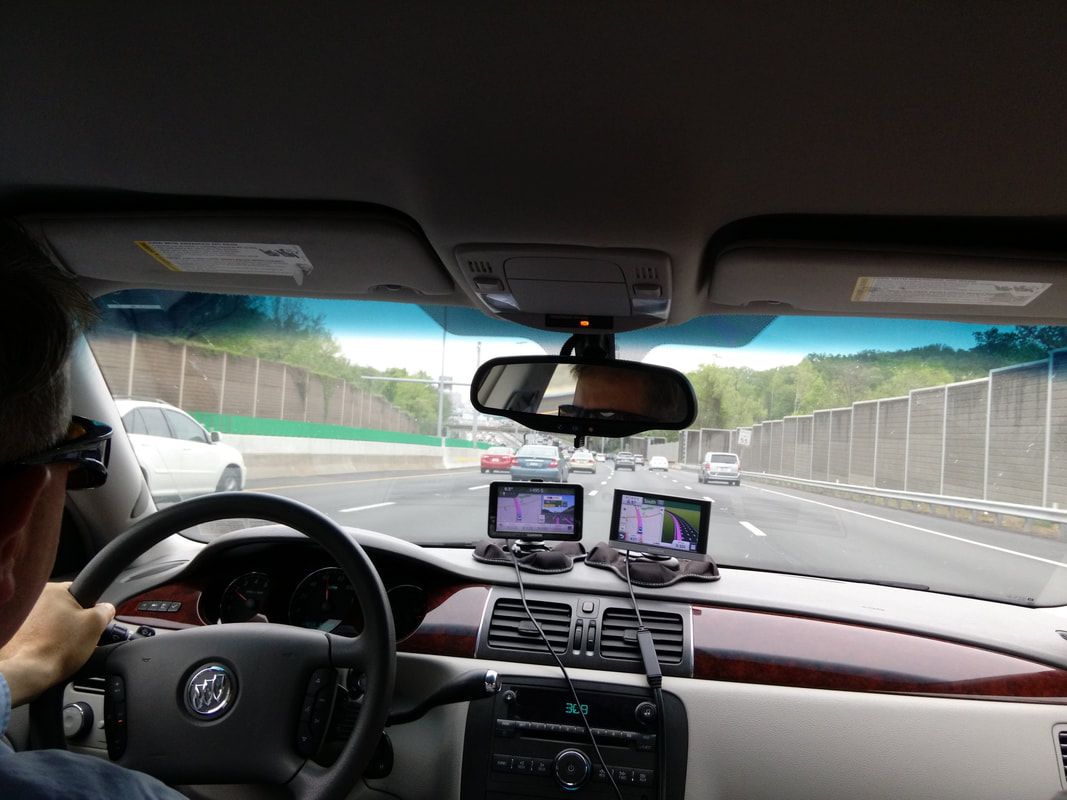 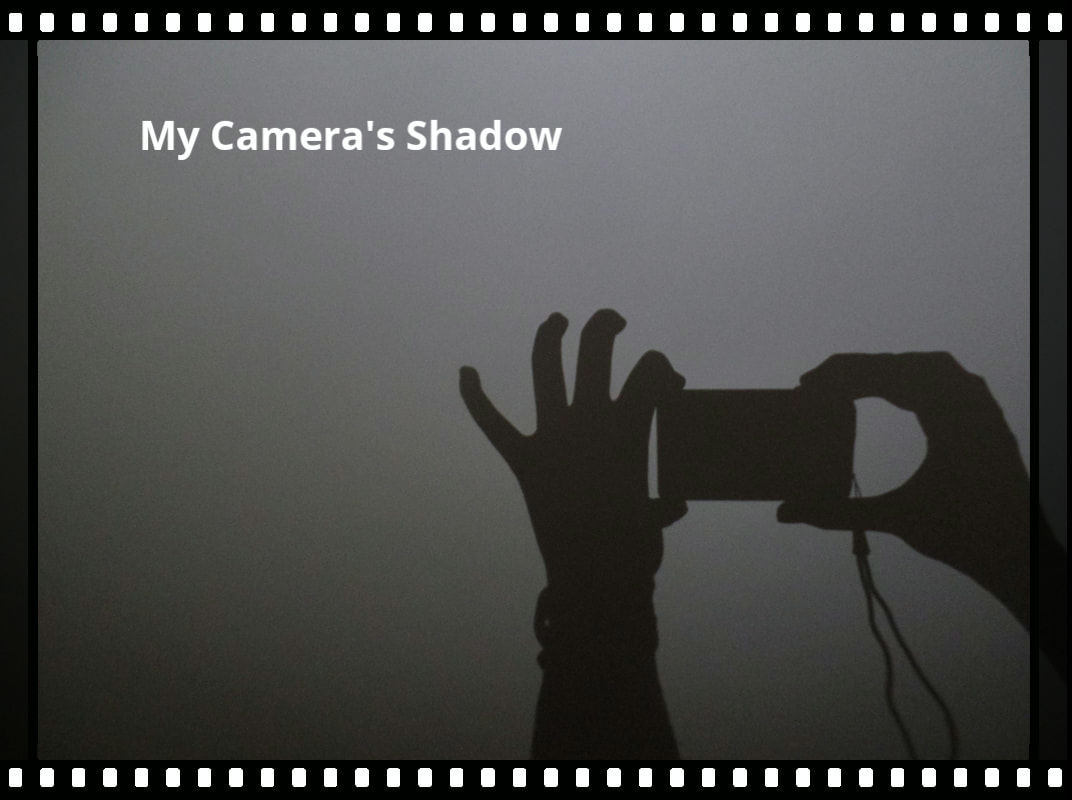 Shadow photography. It all started one night in 2020 when I was going to bed and realized I hadn't snapped my daily photo. What could I photograph in my dark room? I could use my camera and a flashlight to make and photograph shadows! 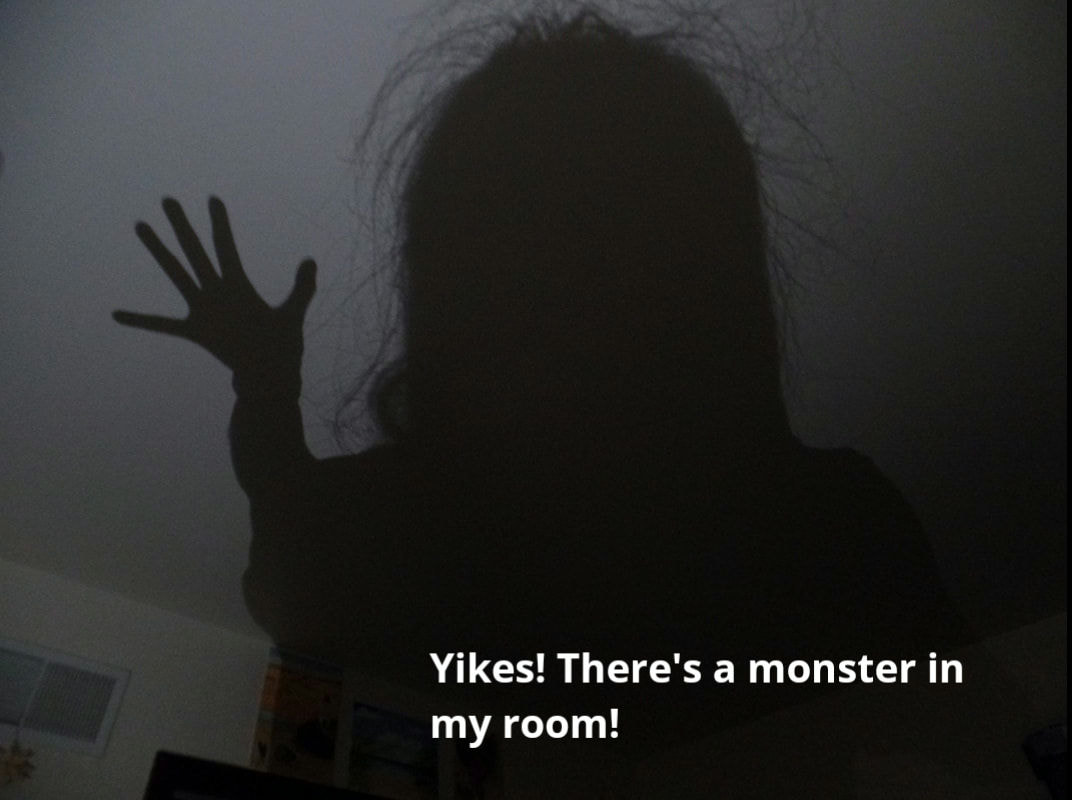 My imagination ran wild. I began by photographing a shadow of myself, a monster. My brother Ben provided his analysis, "I love the sharpness of the shadow, with your individual hairs showing, and I love how disproportionately big your head looks to your hand. Also this is quite an original subject, surprisingly enough. Most people don't get pictures of either shadows or monsters. This is a new and more introspective class of the ubiquitous genera of the 'selfie.' You've brought the earth into a new era of self-awareness." 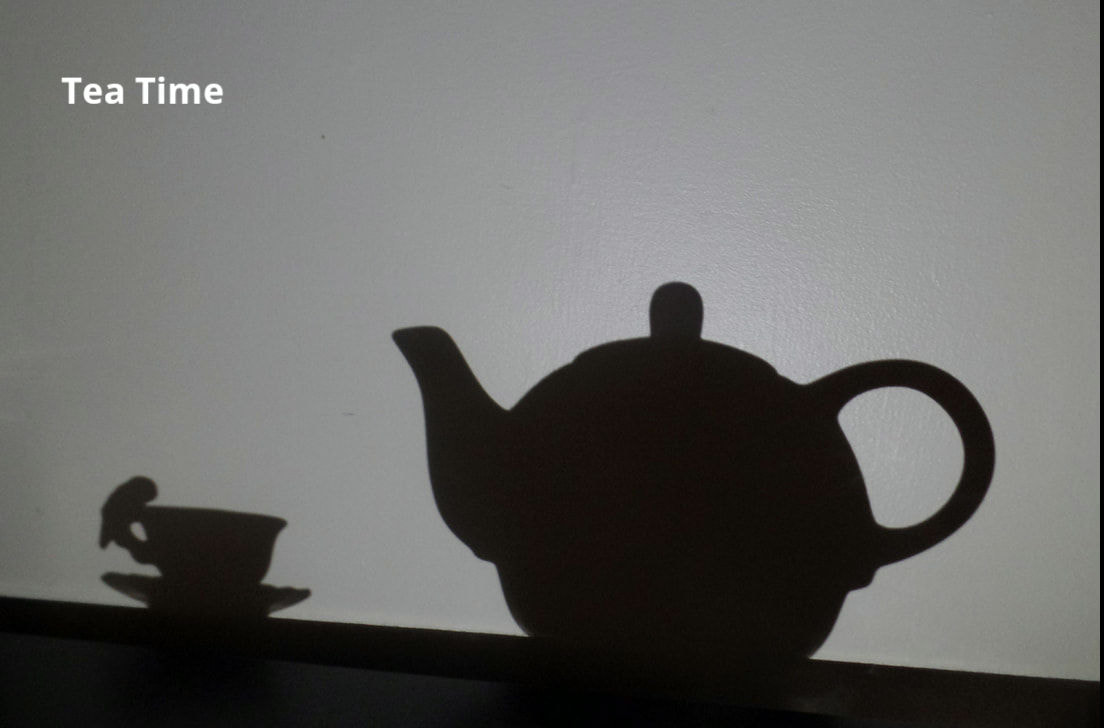 If the monster frightened you, perhaps you ought to drink some tea to calm your nerves... This is the most challenging shadow photo I've taken. Keeping the actual teapot and teacup out of the picture, while positioning them close to the wall to receive a sharp shadow, was difficult. Additionally, I needed to angle my camera to prevent casting its shadow into the picture. 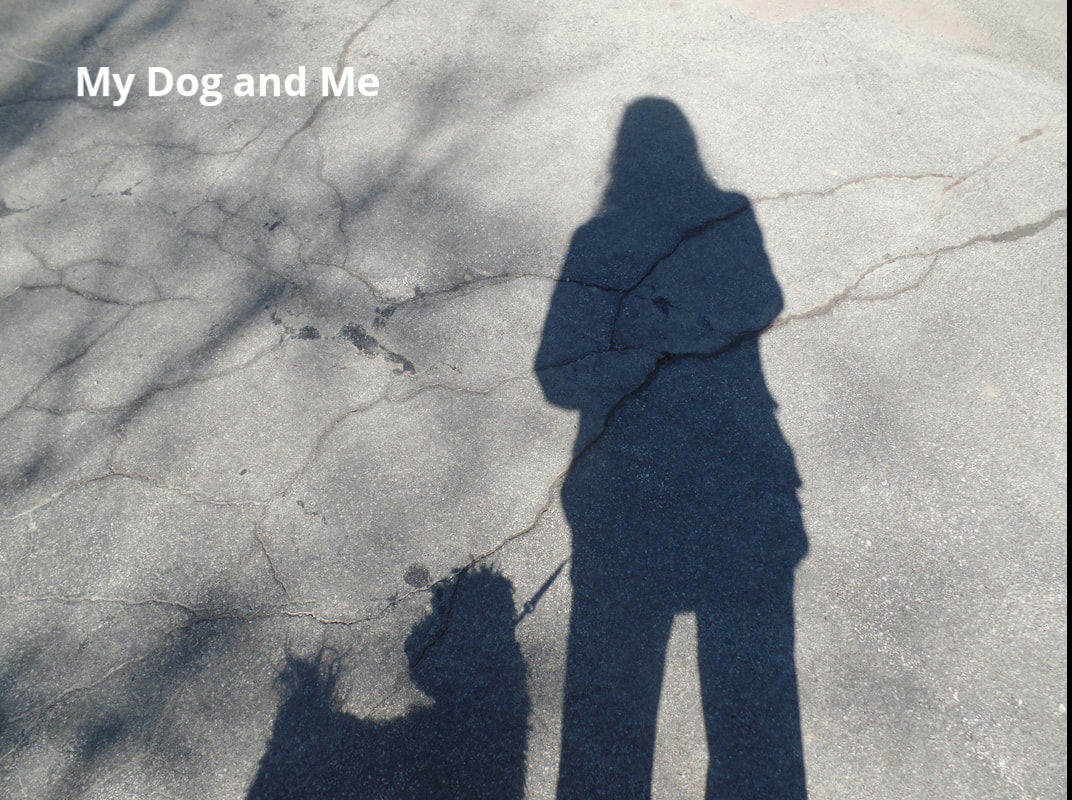 Finally, I waved my magic wand and transformed my dog and me into shadows lurking on the pavement. Did you know I had such superpowers?
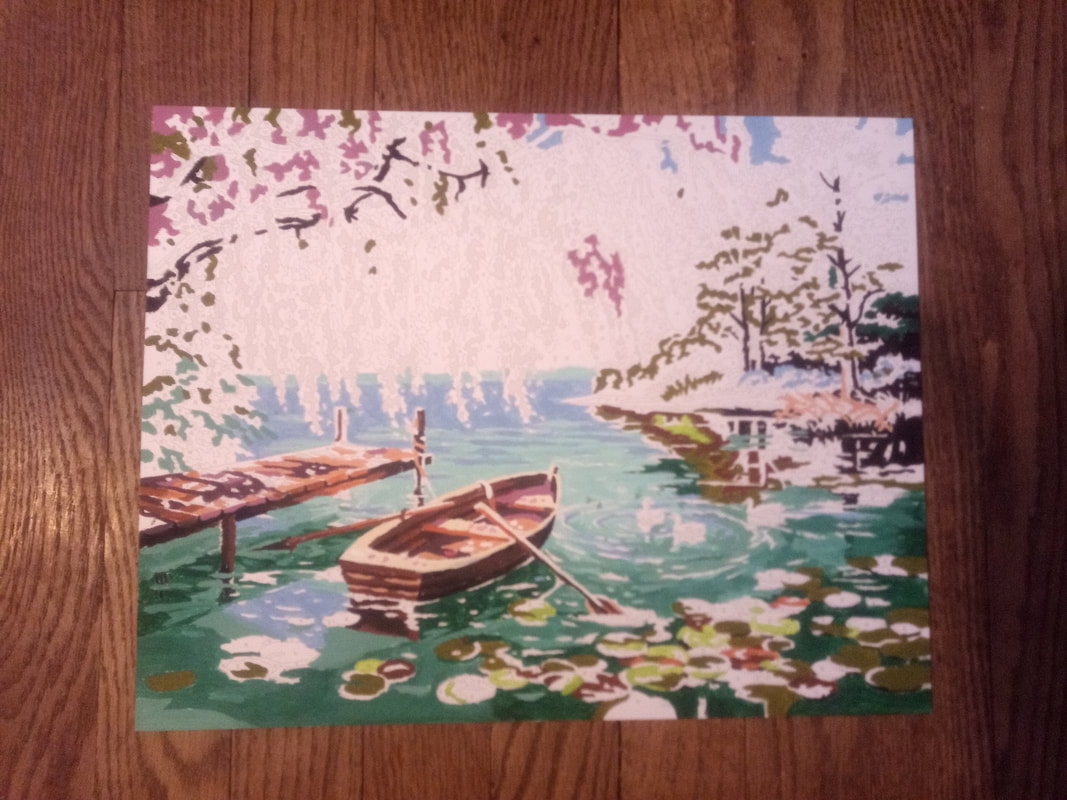
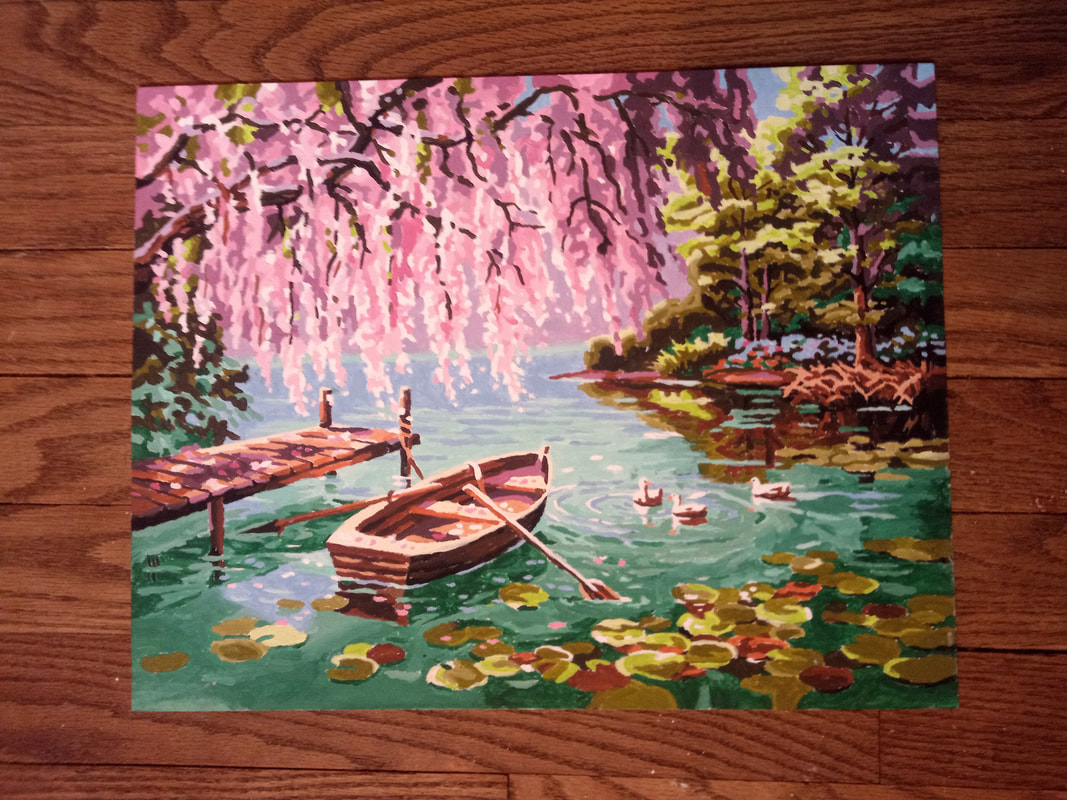
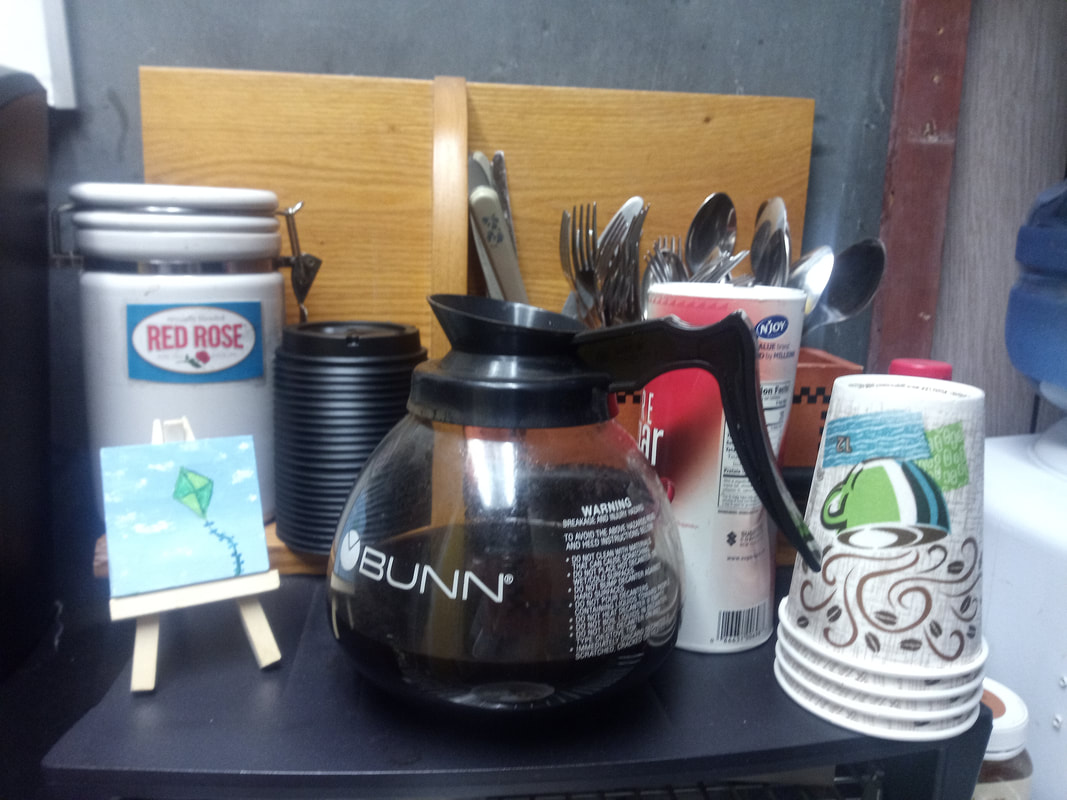
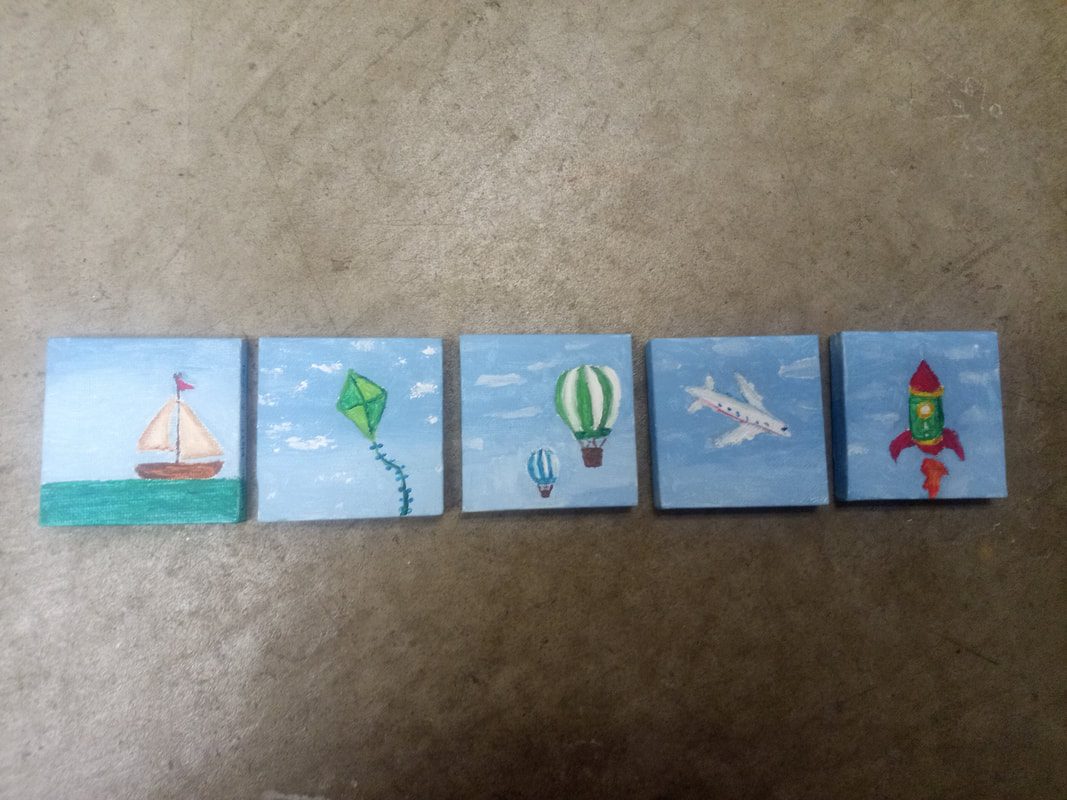
Shadows. Once I viewed them as "ruining" my pictures. Now I photograph them. 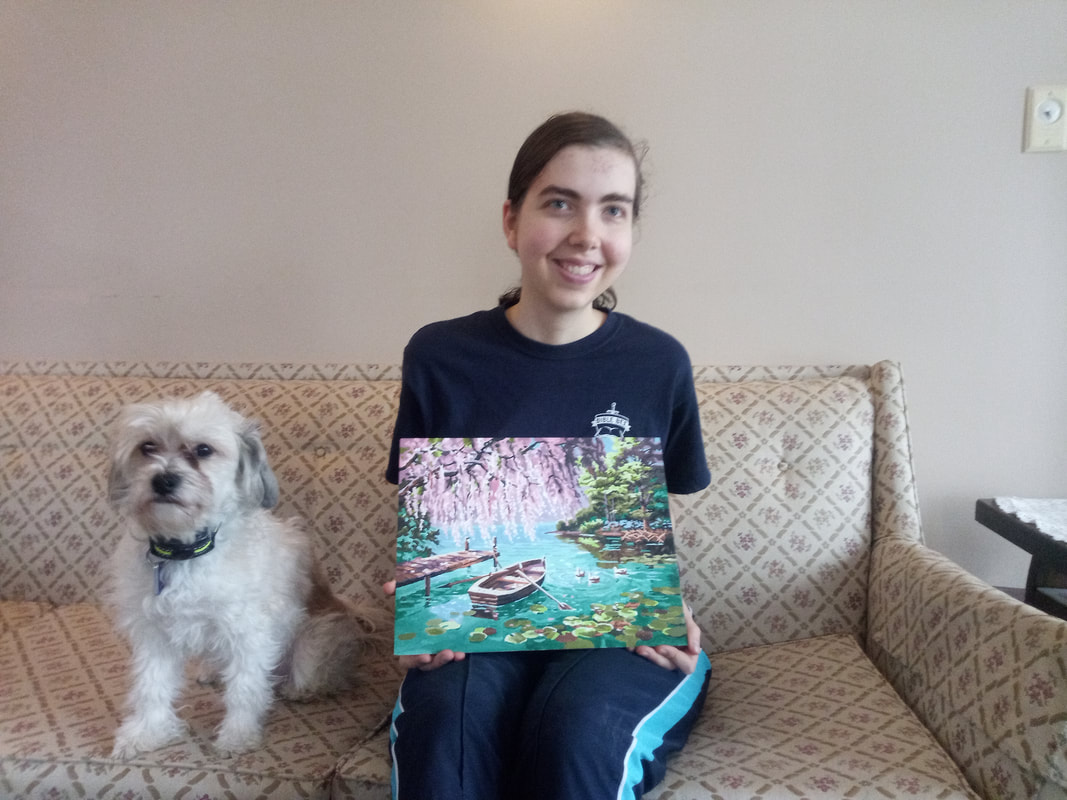 Me with my painting and my dog. Apparently, he didn't want to miss the photo opp. :) "This is for you to paint when you feel up to it," my friends said, as I unwrapped an acrylic paint by number kit. For a year, it sat in my closet, until this month, when my symptoms finally lessened enough to allow me to pick up my brush. The painting took about 20 hours to complete, but I loved every minute of it. I had found something I could do even when I was too foggy to read, my throat hurt, and my body ached. Once I was finished with the painting, I knew it was only the beginning of my journey of painting with acrylics. They dried fast. They weren't very messy. They didn't require much clean-up or set-up. I could easily put them away when I needed to rest. A few days after I finished my paint by number, my dad came home from Walmart. "I bought some mini 2"x2" canvases," he said. "I'd like you to paint 5 for each day of the work week to display by the employee coffee pot. I'll put out a new canvas out each day--that's how they'll know the coffee is fresh." We brainstormed what I should paint. Eventually, we decided on a sailboat for Monday, a kite for Tuesday, hot air balloons for Wednesday, a plane for Thursday, and a rocket for Friday. Our logic for the order of the paintings? You start at ground level and "sail into the week," then you go higher and higher into the sky until Friday, when, boom, the rocket takes off. I used a pencil to lightly sketch an outline onto each canvas and then painted the pictures. These mini canvases are sold with magnetic backings, so I plan on making some as gifts that people can put on their refrigerators. 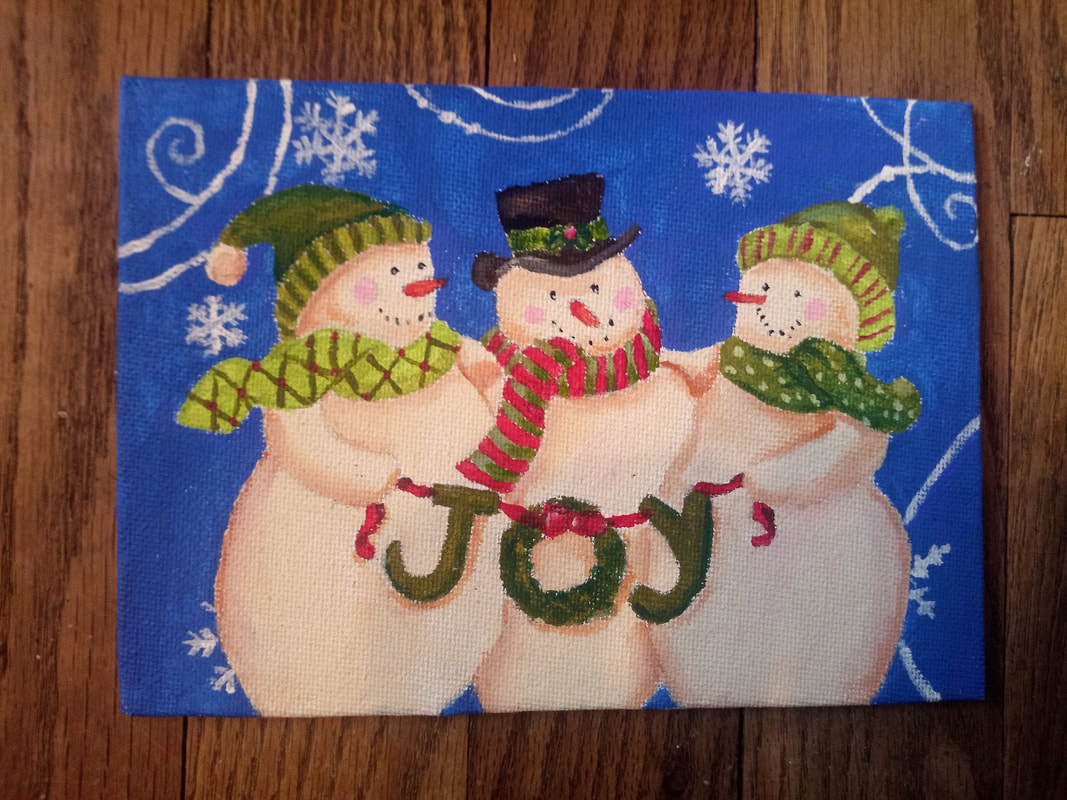 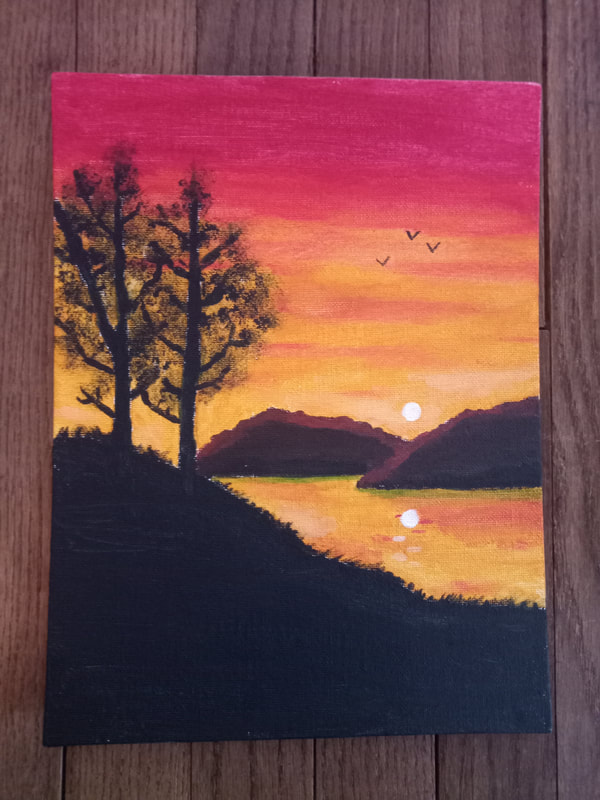 Here are a few more paintings I've done this month. I copied the snowmen from a Christmas gift bag and the sunset from an oil painting I'd done years ago. If you're looking to learn to paint and live in Westmoreland County PA, I highly recommend the Norwin Art League, where I learned to paint with oils years ago.
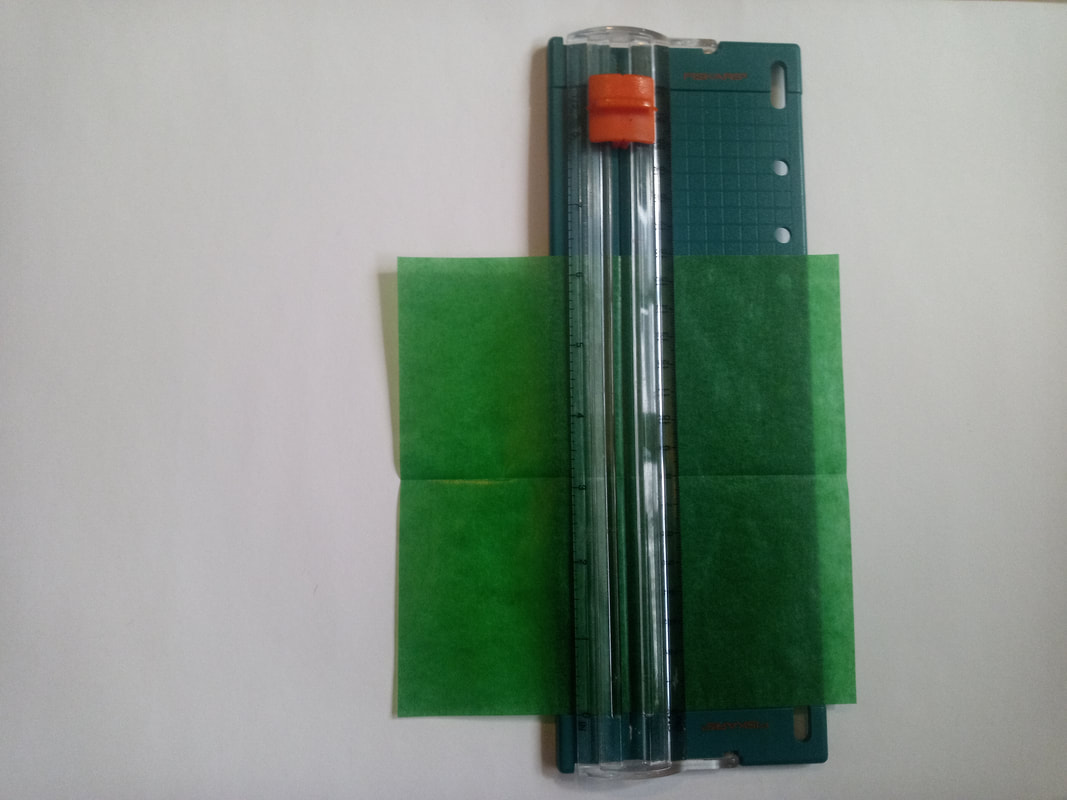
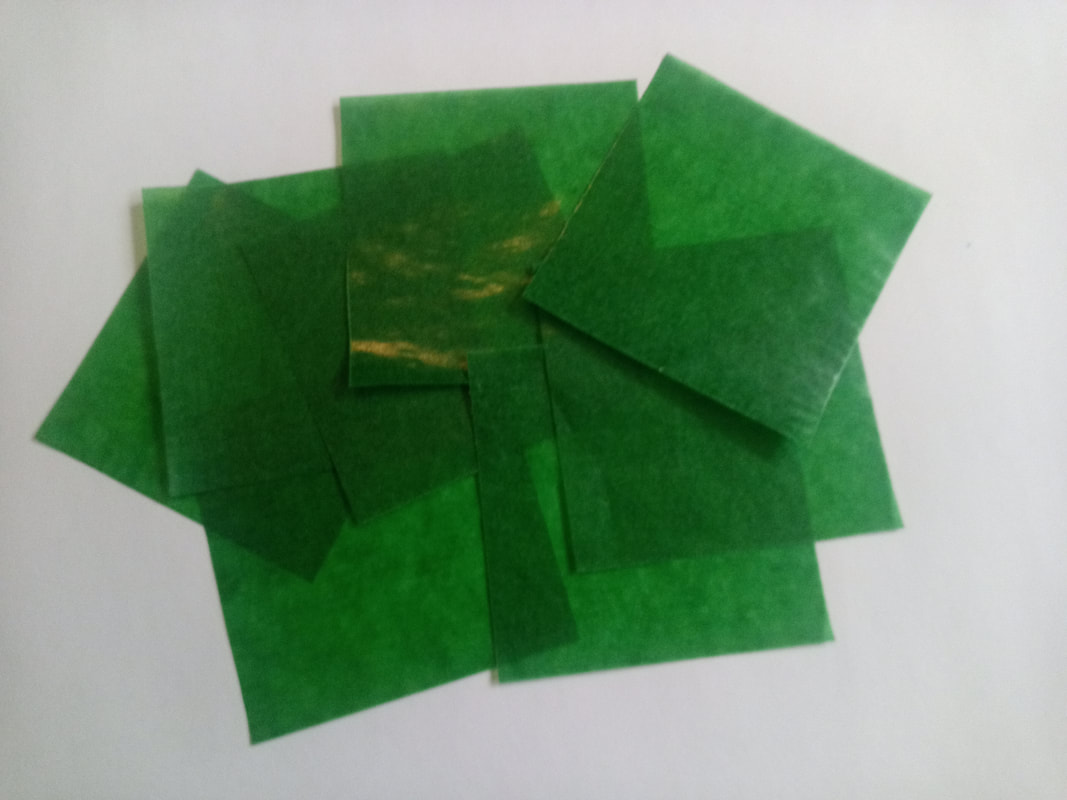
Do you paint with acrylics? What tips can you share? Where do find inspiration for your art?  Would you like to brighten your window? Today I'll show you how by making a pinwheel suncatcher. Supplies: 2 sheets of Kite Paper Paper Cutter Elmer's Re-Stick Glue 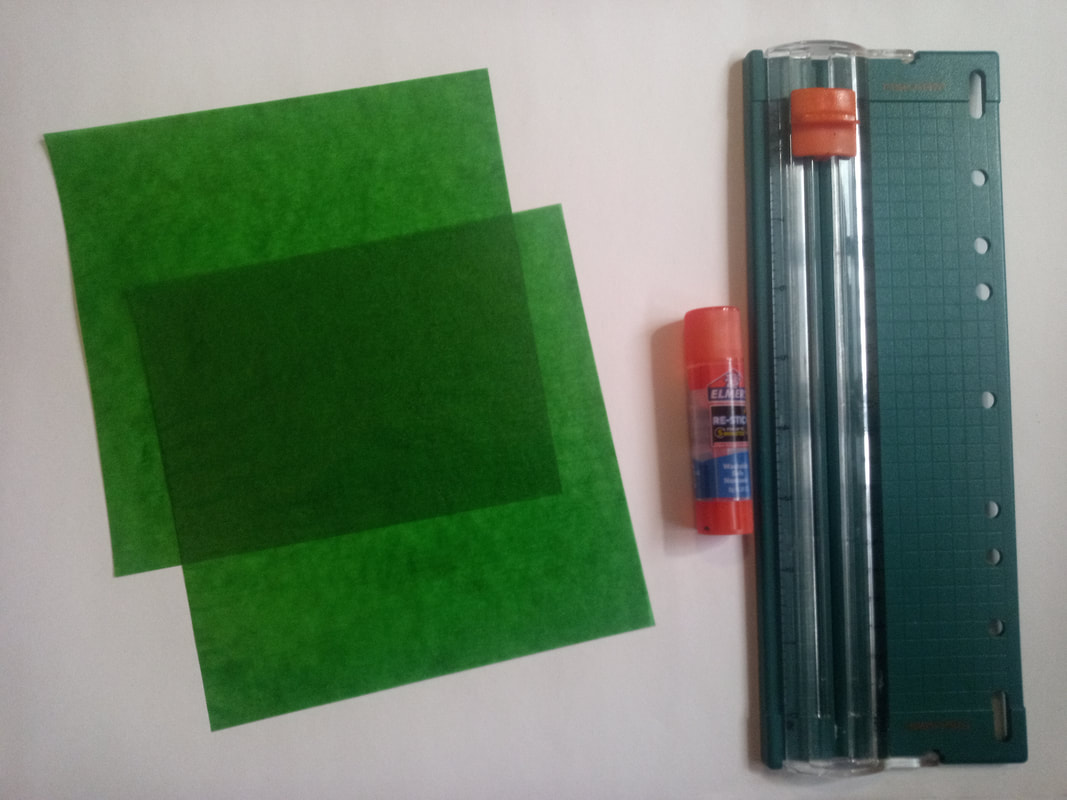 To begin, fold your two sheets of kite paper in half horizontally. Unfold and then fold each sheet in half vertically. Use your paper cutter to cut along the creases. After cutting both sheets, you should have eight squares. Take one of your squares and holding it at a diagonal, fold it from side to side. Then unfold to make a center crease. 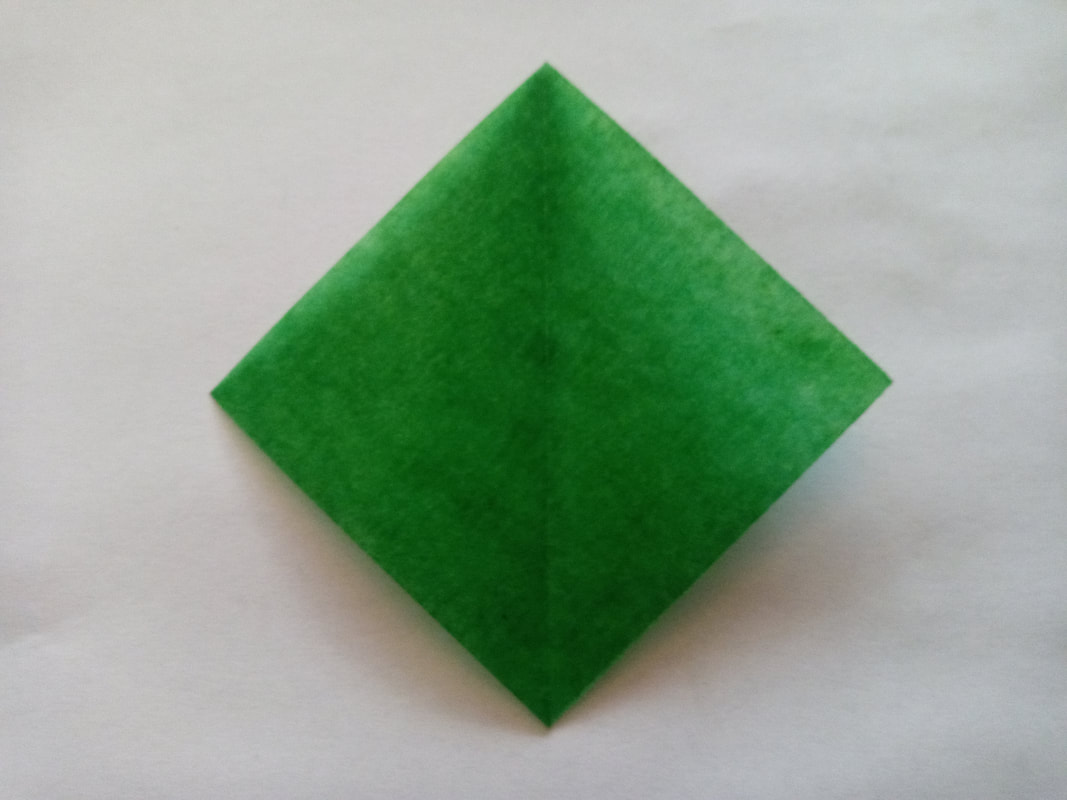 Next, fold the the two side triangle tips toward the center crease and glue in place. 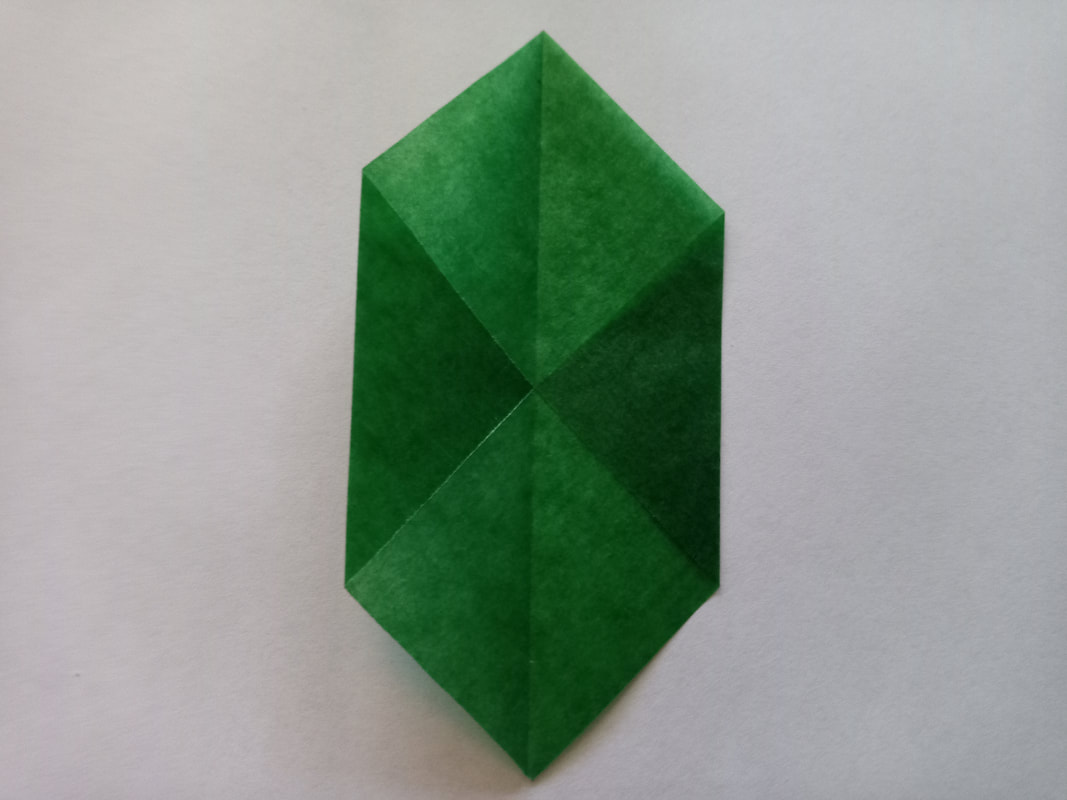 Then fold the two upper sides in and down towards the center so they meet along the center crease. Glue in place. 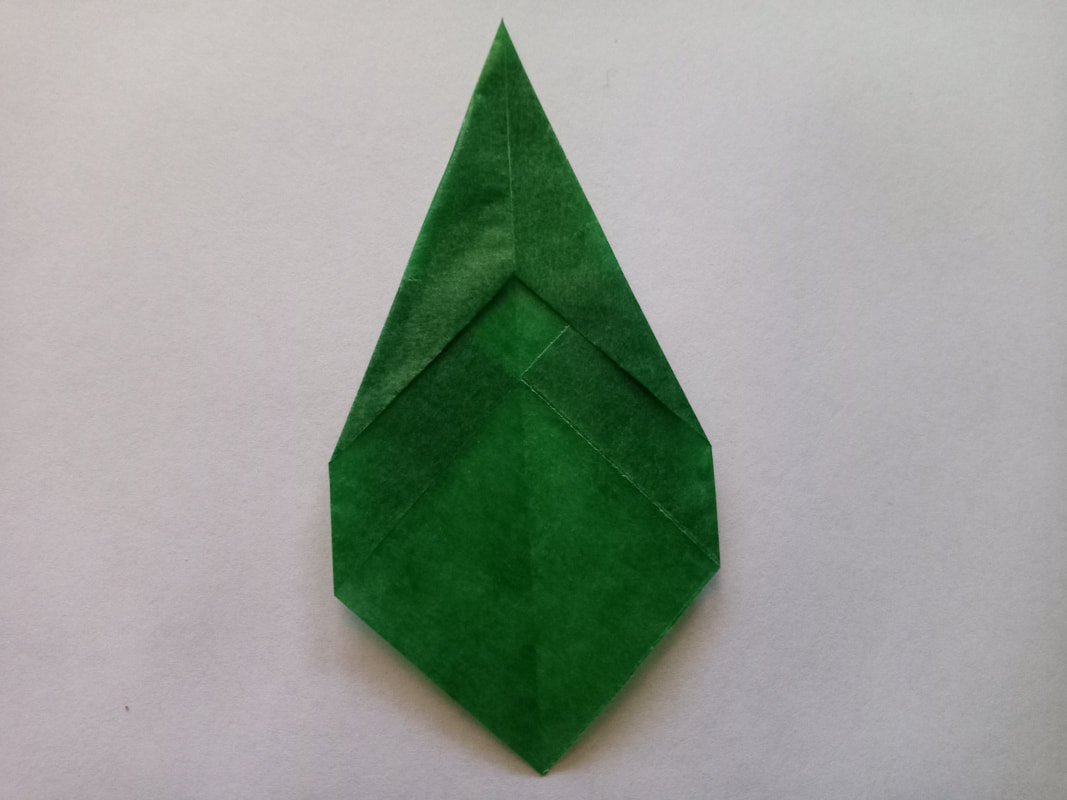 Finally, take the lower right edge of the point and fold so it lies along the center crease. Glue in place. Repeat the above steps with each of your remaining squares. 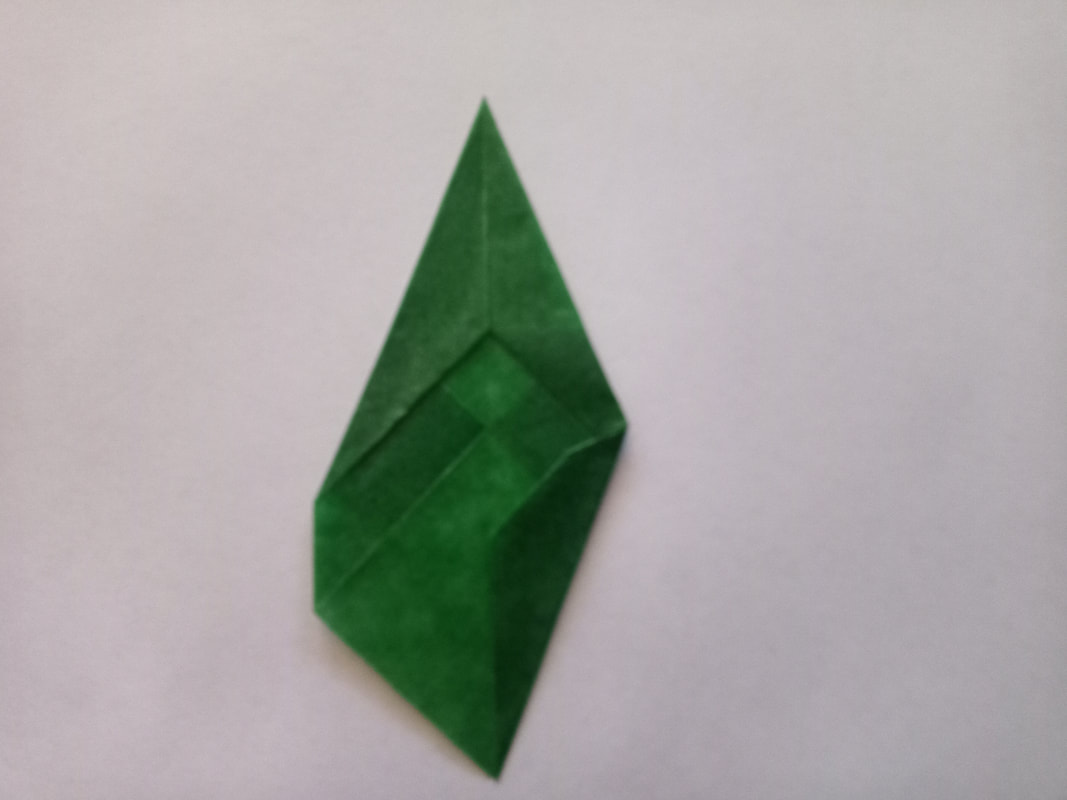 To assemble your suncatcher, begin by aligning and gluing the lower left side of one point on the center crease of a second point, with the bottom corners touching. Continue gluing all the way around until you have used all eight of your folded pieces. The Elmer's Re-Stick glue will allow you to reposition your pieces if needed, making your star more precise. 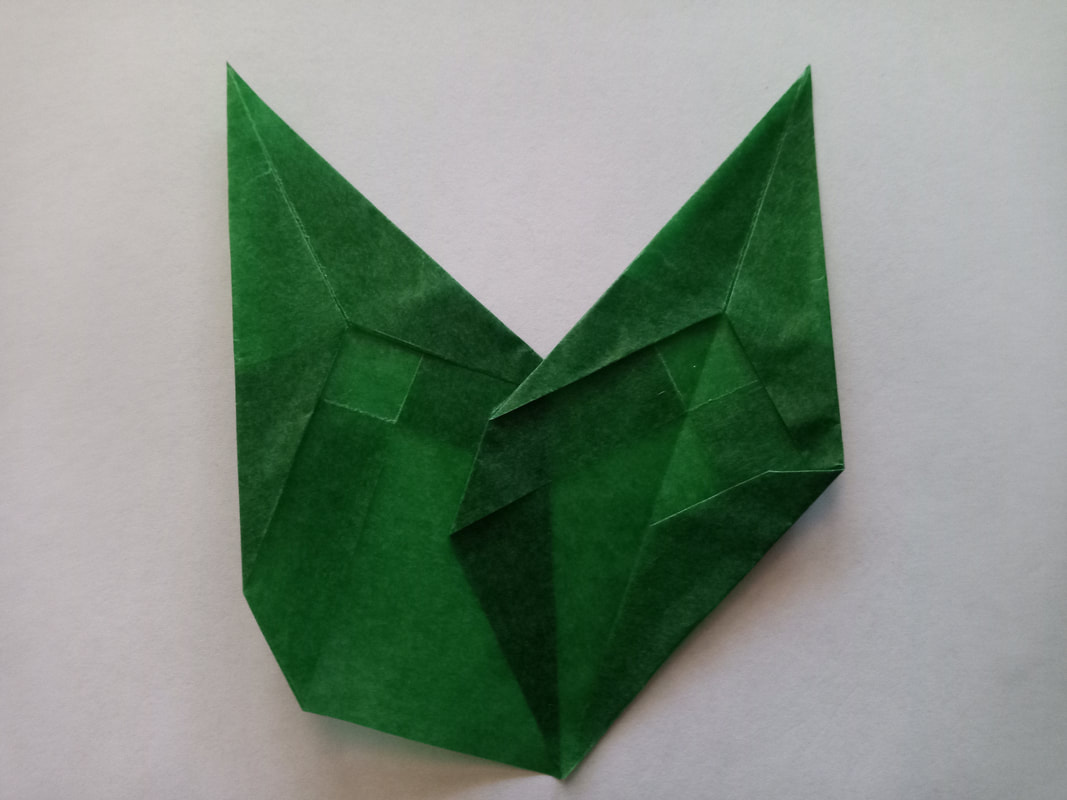 Your suncatcher is now complete! Roll up a small piece of tape and affix it the back of your suncatcher to hang it on your window. These suncatchers look best in dark green, purple, and blue. 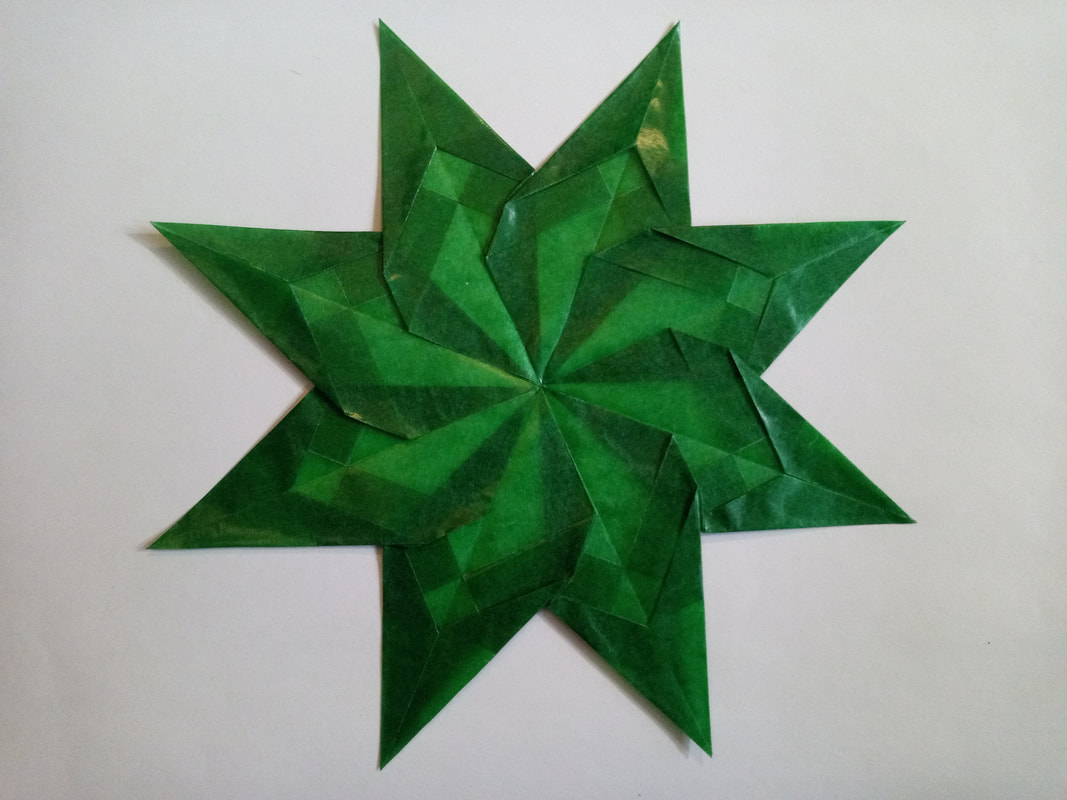 |